So you have an idea for an iOS app? Where do you begin as a developer?
Assuming you have a paid Apple developer account ($99 / year) which is a prerequisite for deploying a free or paid app on the AppStore, let’s begin.
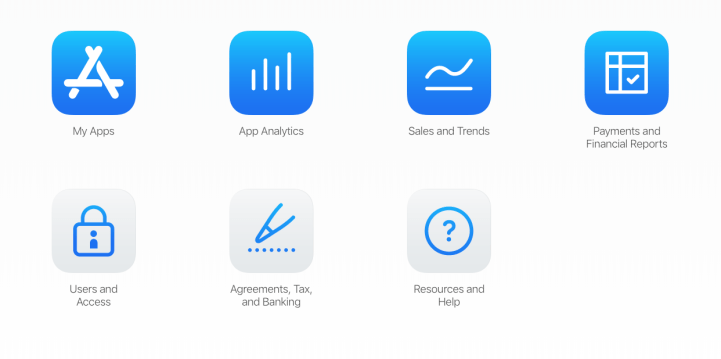
In case you do not currently have a paid account, register on the Apple developer portal. After registering let’s continue on to create an App Store Connect app. On App Store connect you are able to create your product page, add in-app purchases, upload, test and submit your app. You are also able to manage releases and updates, gain insights into your App’s performance and access additional features.
Log into your developer account

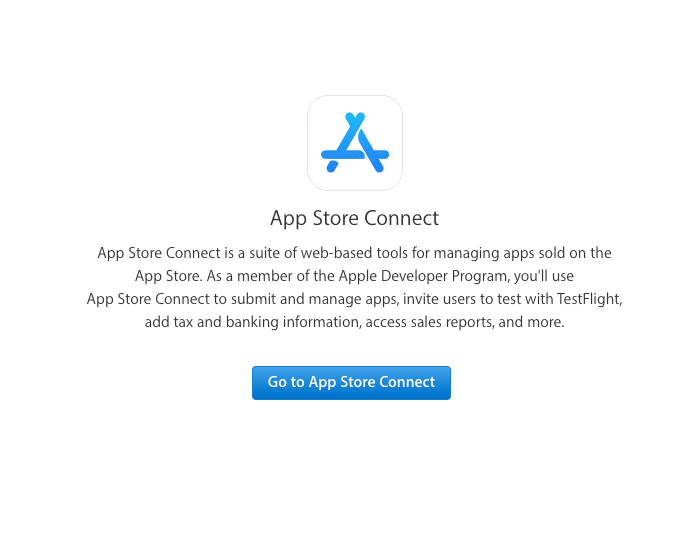
Go to AppStore Connect
Select My Apps from the list below.
Click on the “+” button at the top left window of the App Store Connect screen to create a New App.

This is the New App create screen. However, unless you already have an App ID you need to create one in Certificates, Identifiers & Profiles. If you need to create an App ID jump to the next section below, title Certificates, Identifiers & Profiles. After you have created an App ID navigate back here to complete the New App section.
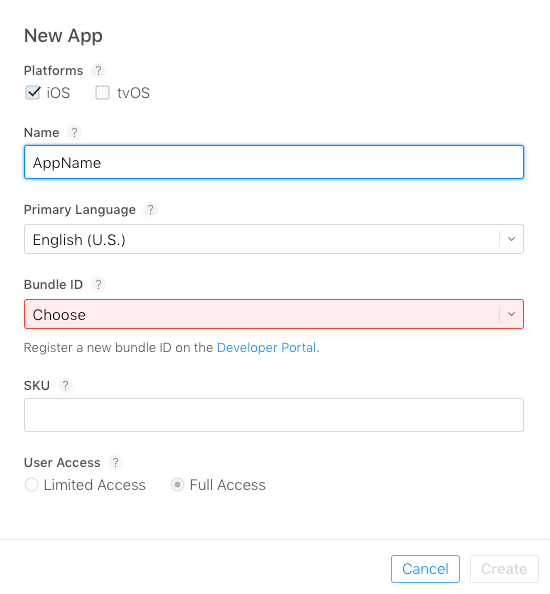
Register an App ID in Certificates, Identifiers & Profiles. Developer Portal. Later you will also be using this App Id to include in your Distributions Profile. More on Distribution Profile later.

After you have created an App ID navigate back to the New App screen above and continue filling out the required fields. The Bundle Id should be in the following format com.alexcpaul.appname, you can use the same bundle string for the SKU field. At this point you will now have a blank app icon as below for the newly created App Store Connect app. You or your designer will provide a 1024 x 1024 app icon. See the Human Interface Guidelines for specifics on app and asset icon sizes.

An early way to go through Apple’s approval process is to use TestFlight. This process will give you feedback on any potential red flags with your app e.g does your app need a way to flag users creating content on a social app. TestFlight also is a process that enables developers to distribute their apps to users for testing before the app is available on the App Store. This will give you, the developer vital feedback on UI/UX and bugs encountered in the app or yes more feature requests.
When you are ready to push your beta app to TestFlight, follow the upload app to App Store Connect Apple documentation to push your app from Xcode to TestFlight.
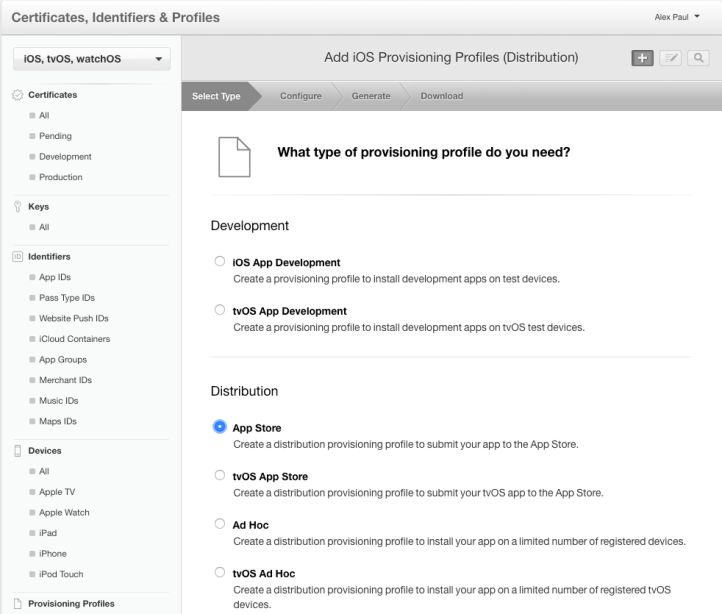
You will need a Distribution Profile. A Distribution Profile is required to submit apps to the App Store. The Distribution Profile includes your team information along with the App ID associated with the app. Navigate to the Certificates and Identifiers portal on Apple developer to create a Distribution Profile.
Creating a Distribution Profile
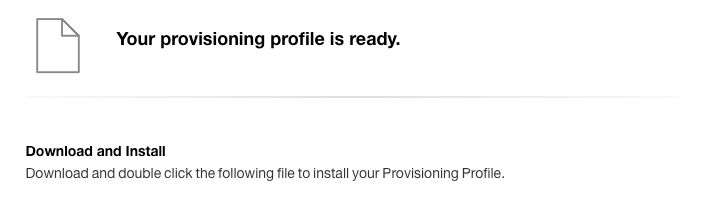
Download the Distribution Profile to you desktop when it’s created. This will be used in Xcode while Archiving for the App Store / TestFlight
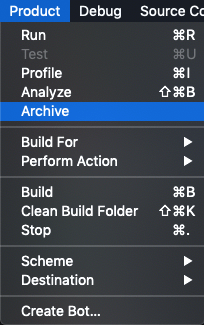
Back in Xcode select Product in the toolbar and select Archive. This will start the process of archiving your app and creating an .ipa file to be uploaded to the App Store.
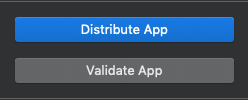
Click on the Distribute App button and keep navigating through the screens as you get to the Uploading dialog box.

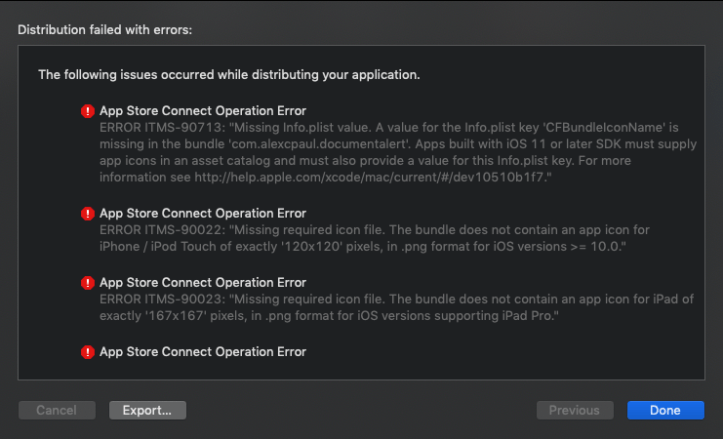
Error due to missing required icon files. Attempting to upload an app to App Store connect without required app icons. App Icon resizer will be used to create all the different sizes of the required icons. After all the icons have been downloaded and imported to the app icon catalog a next archive will be created. Getting through error screen such as below is normal, solve the errors which most times are verbose enough with explanations, other times you may have to use a Google search.
More on creating asset catalogs and sets.
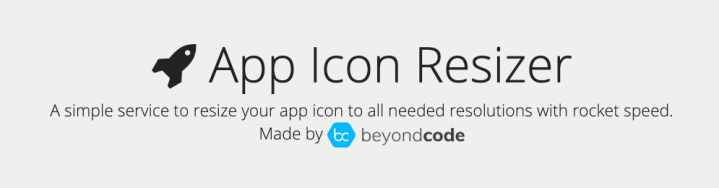
App Icon Resizer is a free site to create all the required app icons for your iOS app. After uploading a 1024 x 1024 image to App Icon Resizer the required icons are created. When the image resizing process is done you are able to download and add the icons to your asset catalog. Drag and drop from the icons folder from your downloads to the icon appropriate size in the app icon catalog.
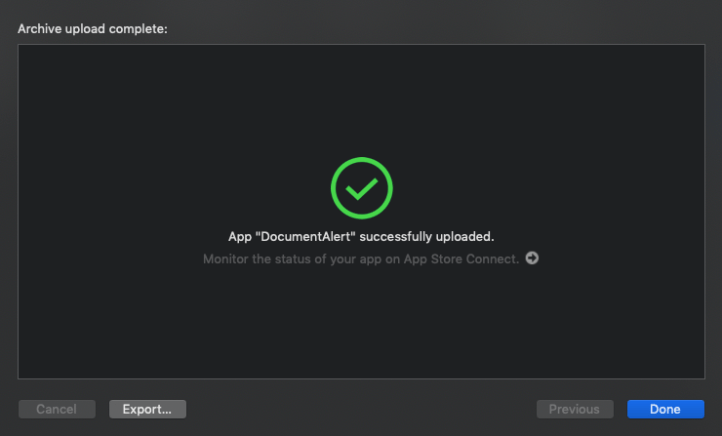
Here the app has successfully uploaded to App Store Connect. At this point processing is continued on App Store Connect to get the app ready for submitting to TestFlight or the App Store. When processing is done the app can be added for testing.
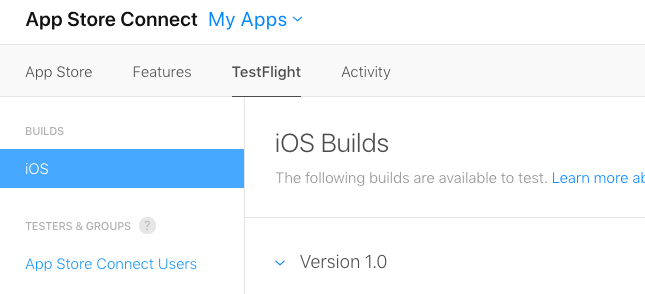
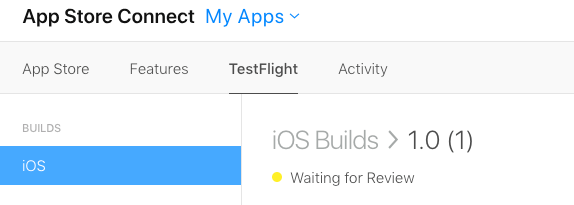
Navigate to App Store Connect and navigate to your newly created app. Select the TestFlight tab in the toolbar under “My Apps”.
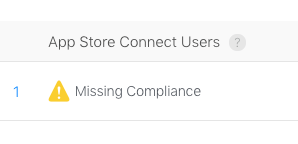
Complete the Compliance section and add external testers so the app can go into review.

Adding external testers will place the app in App Store review.

Here you want to describe to testers what flow process they should put your app through. You will also have an opportunity to add sign in information if required by your app.

After going through and completing the testing requirement fields the app will be placed in “Waiting for Review”. This process may take a day or two for Apple Store review to get back to you with a rejection or approval status.
…..more to come on the app store process as I continue developing a current app I’m working on for distribution to TestFlight / AppStore.
